Garden Help Desk: Thinning and feeding your baby salad greens
-
- When you have harvested your greens and plan to let the plants regrow for another week or two, make sure you gather up any loose bits of leaf to reduce the chances of fungal growth on the soil surface.
-

- Dwarf varieties and other varieties of lettuce can be grown to the baby leaf or young leaf stage in a relatively small space.
-
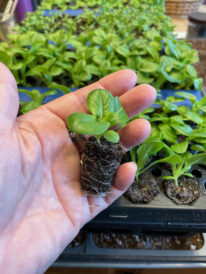
- It’s easiest to space your plants using transplants, but transplants require extra work at the beginning of your project.
-
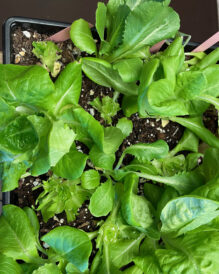
- By harvesting every other plant in the container, there is more room for the remaining plants to grow for another week or two.
-
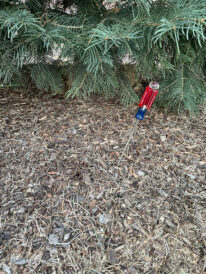
- A long screwdriver is an easy way to check for soil moisture or frozen soil. The screwdriver will move easily through soil only as deep as the soil is moist. If the soil is frozen, it will feel like the screwdriver has hit solid rock or gravel.

Courtesy Meredith Seaver, USU Extension
When you have harvested your greens and plan to let the plants regrow for another week or two, make sure you gather up any loose bits of leaf to reduce the chances of fungal growth on the soil surface.
We’re returning to our winter salad greens project this week.
Last month, we talked about the basics of starting a container garden of baby salad greens. If you were ambitious then and started a container or seedling tray of winter salad greens, you may have some seedlings that need additional attention now.
Once seedlings develop true leaves, it’s time for plant food. You can give your plants the minerals they need by applying liquid fertilizer at one-quarter strength with every watering. Or, you can incorporate some slow-release fertilizer into the potting soil. The slow-release label will tell you how much fertilizer to use based on the size of your container.
If you started your seeds directly in your container, you’ll probably need to do some thinning so your plants have room to grow. Use small scissors to snip out crowded plants instead of pulling up those excess seedlings. If you started your plants in a seedling tray, they will be ready to transplant into your final container once they have two to three sets of true leaves. Remember — good air circulation is important for healthy plant growth. Space or thin your transplants so that that they’ll have a little room to grow. The spacing will be much closer than you’d want out in your garden, but the plants shouldn’t be pressing against each other until harvest time.
With your young plants properly spaced and getting the fertilizer they need, you’ve reached the “growing on” phase of your project. You’ll spend the next few weeks keeping your salad greens in bright light, watching for signs of pests and diseases, and checking the soil moisture.
Courtesy Meredith Seaver, USU Extension
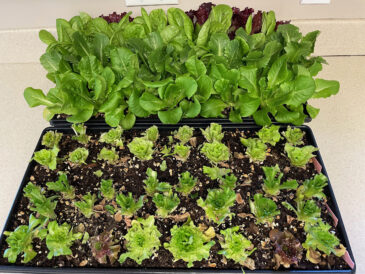
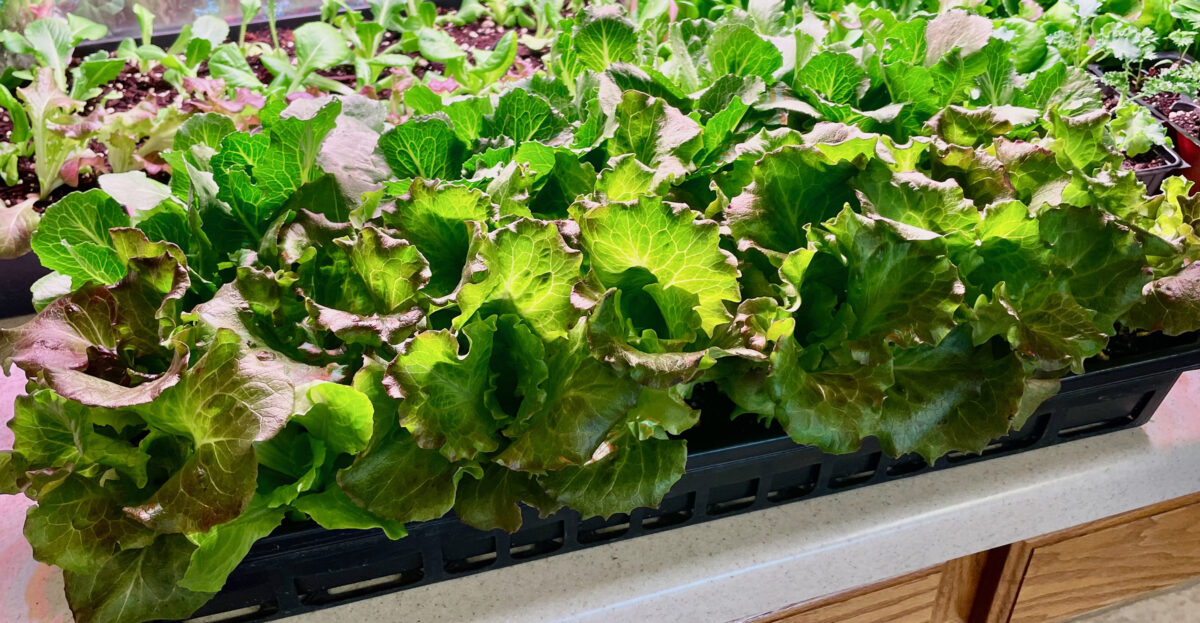
Dwarf varieties and other varieties of lettuce can be grown to the baby leaf or young leaf stage in a relatively small space.
Watering will be your biggest challenge. As your plants grow larger and closer together, you’ll need to spend a few extra minutes making sure water reaches the roots of all your plants. Water from the bottom or gently direct the spray or watering spout between your plants. You might even need to angle the spray of water in from the sides instead of overhead.
It will only take a few weeks after transplanting or thinning for your seedings to reach the baby or young greens stage. The plants will be crowded, but you can give them a little more growing room by harvesting every other plant and leaving the rest to grow for another week or two. Baby chard, spinach and leaf lettuce varieties can be cut back to about 1 inch in height at harvest and the plant will continue to grow and provide you with a second, smaller harvest.
Once you’ve had a second cutting from all your plants, it’s time to say goodbye and start over. Or, if you’d like to continue, use fresh potting mix and start your next planting at about the same time as you make your first harvest.
It has been a dry winter. A couple of years ago after a dry winter some younger boxwoods had died back a bit. This winter has seemed dry, too. Should I give supplemental water?
If the ground isn’t frozen, you can give your shrubs a slow, deep soak a couple of times in the winter, but they don’t need the watering unless there is extended dry weather.
Courtesy Meredith Seaver, USU Extension
It's easiest to space your plants using transplants, but transplants require extra work at the beginning of your project.
All plants lose moisture through their needles and leaves, and that moisture is replaced as water moves from the soil into the roots and up through the plant. For deciduous trees and shrubs, that moisture loss is very restricted once the leaves drop, but for evergreens, this moisture loss happens all year round. Our dry winter winds can pull moisture out of leaves and needles, and if the soil is dry or frozen, that water can’t be replaced. Broadleaf evergreens may show severe leaf scorch, and needles on conifers can turn brown and dry out from the tips down.
The most important part of preventing winter desiccation on evergreen plants is making sure the plants and soil are well-hydrated going into winter. Water deeply in October when you’re ready to shut down your sprinkler system for the year. Then, a slow, deep soak again at the end of November (before the ground freezes) is helpful if the weather has been dry. A generous layer of mulch over the soil also makes a difference.
It’s easy to assume that winter soils are dry when the weather has been dry, but soil moisture is often still good. Always check the soil for moisture before you decide to water your evergreens. That also gives you a chance to make sure the soil isn’t frozen. There is no value in watering if the ground is frozen, so there’s no need to go to the extra effort of hooking up a hose unless you know your shrubs need it and the soil can absorb water.

By harvesting every other plant in the container, there is more room for the remaining plants to grow for another week or two.
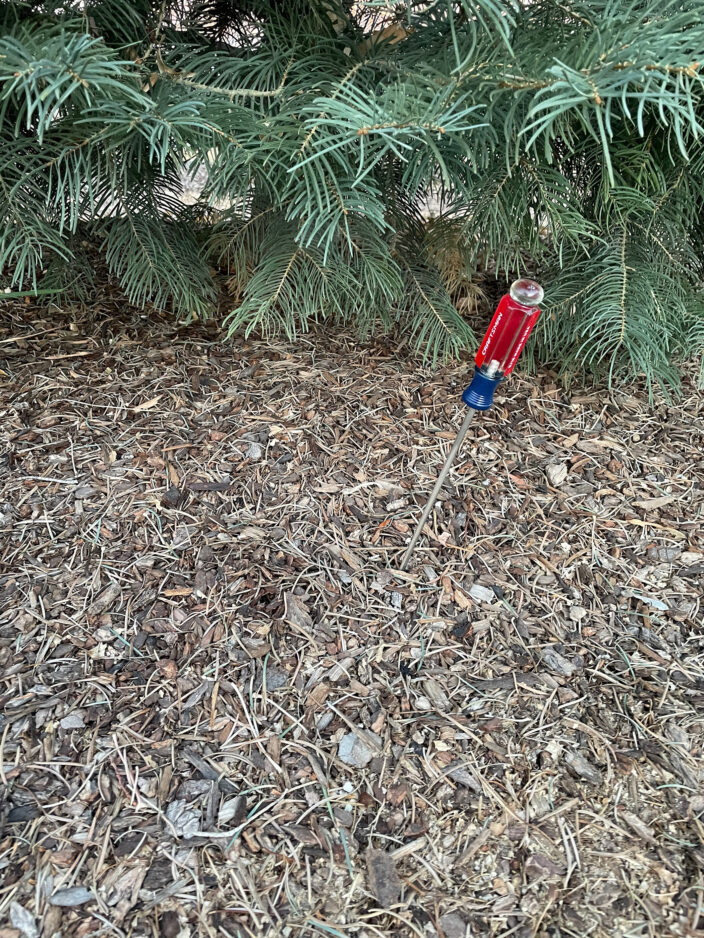
A long screwdriver is an easy way to check for soil moisture or frozen soil. The screwdriver will move easily through soil only as deep as the soil is moist. If the soil is frozen, it will feel like the screwdriver has hit solid rock or gravel.