Garden Help Desk: Planting dry shelling beans in your garden
A few years ago, at a library seed exchange, I came across a small cellophane packet with a few Yellow Eye dry shelling beans. Primarily cream in color, they had a rich ochre splotch on the side with a burgundy ring in the center. Can a bean’s appearance be charming? Well, I was charmed and took the packet home. The person who shared the beans would likely be surprised to learn that years later I am still growing, harvesting and saving these beans as I slowly build up my supply. It has become a pet project and last fall I finally had enough beans to cook and eat. They were deliciously mild, soft, and held their shape well. And I still have plenty to grow this coming summer.
My self-proclaimed job today is to convince you to grow dry shelling beans in your garden. You might wonder, “why grow beans when they are so inexpensive at the grocery store?” It is true that such varieties as pinto, black, navy, and kidney beans are readily available and affordable. They are a staple in many cuisines. But as you have likely experienced, growing a crop yourself results in a fresher harvest and often better flavor.
Growing your own dry shelling beans also allows you to experiment with varieties that are not usually found at a grocery store. There are hundreds of colorful heirloom beans available with different origins, textures, flavors and uses. Many have fun names as well, such as King City Pink, Jacob’s Cattle, and Eye of the Goat. Your favorite seed company likely has a few heirloom options in their dry shelling bean list. I have also learned that some gardeners buy bags of heirloom beans sold for consumption and plant those beans with great success. Reputable online companies such as Rancho Gordo or Baer’s Best Beans are a good place to start.
When it comes time to plant, remember that beans are a warm season crop and germinate best when soil temperatures are above 60°F. Plant in fertile, well-draining soil about a week before your average last frost date. Incorporating organic matter and a complete fertilizer into the soil before planting will likely be sufficient for a healthy crop. Space seeds 1″ deep and 2-3″ apart in rows 18-24″ wide. Bush types do not need trellising, but pole types will need some support. Your seed packet or a quick internet search will help you determine if your plants will have a bush or pole growing habit. I have found that most heirloom dry shelling beans are a pole type bean. I use cattle panels attached to T-posts to provide the necessary support for these vines to climb.
Many gardeners choose to succession plant their beans every couple of weeks to ensure a summer-long harvest. However, you might want to plant most of your heirloom pole beans all at once because they often require a long growing season to ripen.
Keep the soil evenly moist, especially when flowering. A layer of mulch will help to maintain moisture and cut down on weeds. As the pods mature, remember to leave them on the vines until they turn yellow and dry. When the beans rattle in the brittle pod, they are ready to harvest.
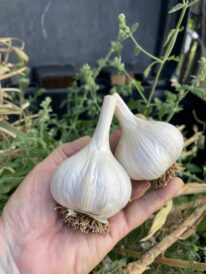
After removing the dry pods from the plant, let them finish drying on a tray somewhere in the shade for a week or so. Then separate the pod to extract the beans. You can do it by hand one at a time, or you could put all the pods in a pillowcase and knock it around a bit outside on the front porch. Once you have collected the beans, and have ensured that they are dry, store them in an airtight container. At this point, it would be appropriate to admire what you’ve grown and show them off to friends and family! And don’t forget to offer them a few beans so they can grow their own next summer.
Meredith Seaver is a USU Extension horticulture assistant.